
Rental car pickup photos: 10 shots in 2 minutes
Before you drive off, walk around the car and take ten photos: the four corners, the windshield, the wheels, every existing mark up close, the dashboard with mileage and fuel, the interior and the plate. Repeat the same shots at return. A timestamp camera puts the date, time and place on each one.
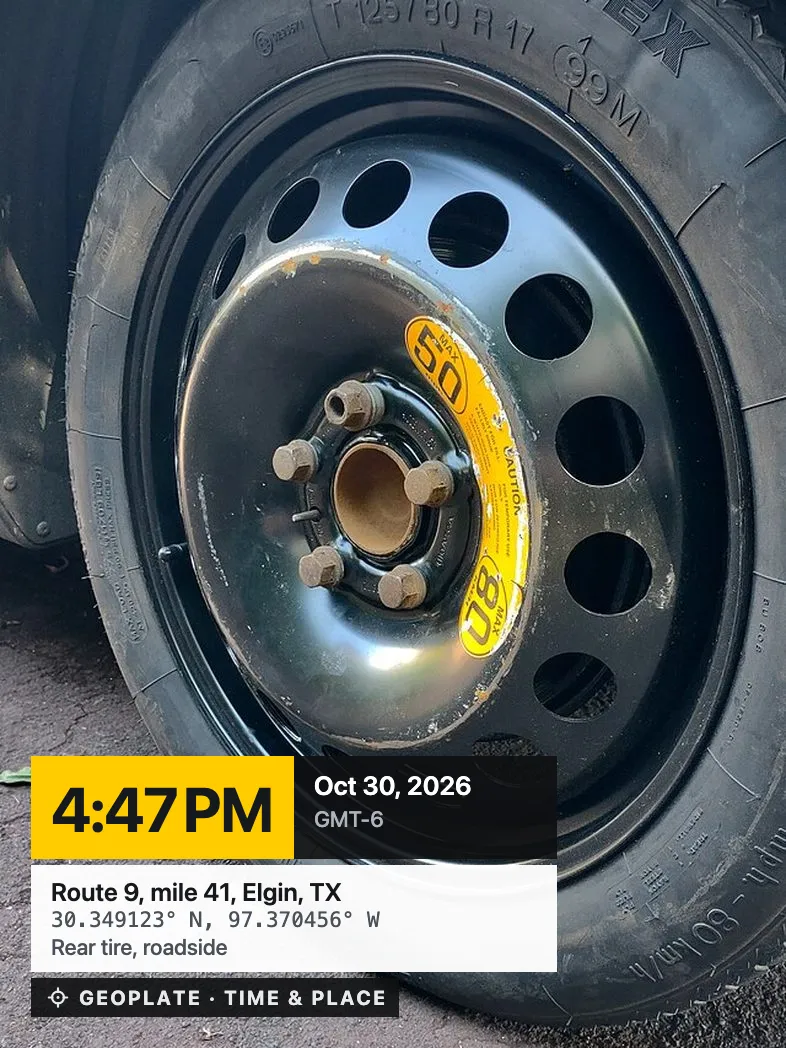
Why photos at pickup matter
Pickup is rushed. Someone hands you keys, maybe a damage sheet with a few marks on a drawing, the lot is dim, and you want to get going. At return, a different person checks the car. If they find a scratch, the question is simple: was it there before?
Photos taken on the lot, with the date and time on them, are your record of the car as you got it. They don't settle anything by themselves, but they make that conversation short. Ask the agent to note any marks on the rental agreement too.
The 10 shots
| # | Shot | How | What it records |
|---|---|---|---|
| 1 | Front left corner | Step back so the front and the left side fit in one frame | Bumper, hood, left side |
| 2 | Front right corner | Same from the other side | Bumper, right side |
| 3 | Rear right corner | Rear and right side together | Rear bumper, trunk lid |
| 4 | Rear left corner | Rear and left side together | Rear bumper, left side |
| 5 | Windshield | From the front, at an angle to the light | Chips and cracks |
| 6 | Wheels | Each wheel as you pass, from a low angle | Curb rash, tire wear |
| 7 | Every existing mark | Close up, then one step back so the panel shows | Which panel, how big |
| 8 | Dashboard | Engine on, mileage and fuel gauge in one frame | Mileage and fuel at pickup |
| 9 | Interior and trunk | Front seats, back seats, trunk floor | Stains, tears, anything left inside |
| 10 | Plate and parking spot | The plate with the bay number or a lot sign behind it | Which car, where you got it |
Four corners cover all four sides with two sides per photo, which is why ten shots are enough. Add more close-ups if the car has many marks.
Two minutes: the order that works
- Start at the driver's door and walk around: four corners, each wheel as you pass.
- Go back for close-ups of every mark you saw, including the ones on the damage sheet.
- Shoot the windshield from the front.
- Get in, start the car, and shoot the dashboard.
- Interior, then the trunk.
- The plate and the parking spot last, as you leave.
Or record one walkaround video. Geoplate records clips up to 10 minutes, and the time keeps running on the stamp, so a slow lap around the car is easy. Photos are easier to send and compare; a video shows everything in one go. Doing both costs a minute more.
Set up the stamp once
Geoplate has templates for exactly this. In the Delivery section, Vehicle Check prints the time, date and address plus lines for Vehicle, Odometer, Fuel, Driver and Defect. Fill in the Vehicle line with the plate or model before you start. Trip Start and Trip End carry Vehicle, Odometer and Fuel lines for the beginning and end of the rental.
For close-ups of marks, Damage Record in the Damage & records section adds the item, the damage, a reference number and the compass heading, so you can tell which side of the car a photo shows.
Shoot from the Lock Screen
On iOS 18 and later, add the Stamp Camera control to your Lock Screen. One tap opens the stamp camera without unlocking. See the Lock Screen camera.
At return: the same 10 shots
Park, and before you hand over the keys, take the same ten photos from the same angles. Matching pairs are what make the photos useful: front left corner at pickup, front left corner at return. Shoot the dashboard with the final mileage and fuel.
If an agent checks the car with you, take your photos after they finish. If you return after hours, your photos are the only record of how and where you left the car, so add the parking spot and the key drop box.
Mistakes that make photos useless
- Only close-ups. A scratch photographed from 10 cm doesn't show which panel it's on. Step back for a second shot.
- A dark garage. Use the flash for close-ups, or ask for a car in a lit row.
- Skipping the low parts. Lower bumper edges and wheels are where damage hides.
- A dirty or wet car. Marks hide under dirt and water. Note it on the agreement and take the photos anyway.
- No date on the picture. A regular photo sent through a chat app may lose its date. A stamp keeps it on the image.
- Deleting them after the trip. Keep the photos until the final bill is settled and any deposit is back.
Took the photos without a stamp?
Geoplate can stamp them afterwards with the date and place each one was taken: see how to timestamp photos you already took. For which fields belong on the stamp, see photo with date, time and location.
Where to go next
Questions
What photos should I take when I rent a car?
The four corners, the windshield, the wheels, close-ups of every existing mark, the dashboard with mileage and fuel, the interior and trunk, and the plate with the parking spot. Then the same set at return.
Should I take a video too?
It helps. A slow walkaround video shows the whole car in one clip. Geoplate records up to 10 minutes with the time running on the stamp.
How do I show when the photos were taken?
Use a timestamp camera, so the date and time are printed on each picture. Geoplate also keeps the same date and place inside the copy it saves to Photos.
Do I need photos of the inside?
Yes. Stains and tears on seats count as damage too, and a trunk photo shows you didn't leave anything behind.
What if I find damage after leaving the lot?
Photograph it where you are, with the stamp, and tell the rental company before you drive on.
Does Geoplate send the photos to the rental company?
No. Geoplate doesn't upload anything. Save the photos to Photos and send them yourself if you need to.